SurveyJS and PowerApps Portals [Part 1]

 SurveyJS is an open-source survey and form library for JavaScript that allows you to create customizable surveys and forms for collecting user feedback or data. SurveyJS provides a simple and intuitive way to design and manage surveys and forms using a variety of question types, such as multiple choice, rating, dropdown, and text fields.

SurveyJS would be a good tool to reply upon when it is needed to create assessment forms/ feedback forms from Dynamics 365 CE and PowerApps Portals. In this post, let us see how to leverage SurveyJS in PowerApps Portals without any APIs. 

No major pre-requisites are required, except basic understanding of PowerApps Portals and jQuery.


Get Started:

  • Create a Web Page in PowerApps Portals.
  • Create a Page Template in PowerApps Portals.
  • Create a Web Template in PowerApps Portals.

Create a Web Template in PowerApps Portals:

  • Open the "Portal Management" app from Apps section on the left navigation at https://make.powerapps.com.
  • Go to Portals --> Web Templates.
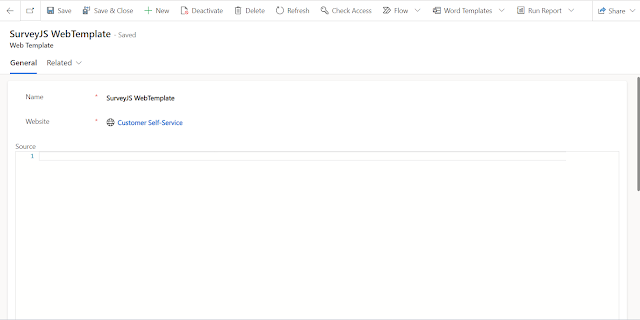
  • Click "New". Provide required details.
  • Name: "SurveyJS WebTemplate"
  • Website: select respective website from the lookup.
  • Save

    New Web Template

    Create a Page Template in PowerApps Portals

    • Go to Page Templates.
    • Click "New". Provide required details.
    • Name: "SurveyJS Page Template"
    • Website: select respective website from the lookup.
    • Type: Web Template
    • Web Template: "SurveyJS WebTemplate" (the one we have created above)
    • User website Header and Footer: True
    • Save

    Create a Web Page in PowerApps Portals

    • Go to Web Pages.
    • Click "New". Provide required details.
    • Name: "SurveyJS Web Page"
    • Website: select respective website from the lookup.
    • Parent Page: "Home"
    • Partial Url: surveyjs-form
    • Page Template: "SurveyJS Page Template" (the one created above)
    • Publishing State: "Published"
    • Save

    Comments

    Popular posts from this blog

    Validate an email input in a Canvas Application | PowerApps

    Validate an email input in a Canvas Application | PowerApps In this post let us see, how to Validate an email input in a Canvas Application UI Validations helps us to ensure, valid data is received from the End User to complete an operation helps end user to provide right information the validation action depends on the type of the input control for Text Input Control - mostly we go with "OnChange" for check box control - "OnCheck and On uncheck" for Drop Down and Combo Box Controls - "OnChange" or "OnSelect" etc., Now, let us see how can we validate an email input, a phone number input and a name input. How to validate an email input value is valid? We can leverage "Regex" (Regular Expressions) to valid user inputs. Let us consider the Email Input Control Name as -  txtEmail.Text. OnChange of this Control let us i

    How to create a "pop-up box" in PowerApps

    in this post, let us see how to create a Pop-Up in Canvas App required controls: rectangular icon label buttons - 2 take a "rectangular icon" and make it screen size update it's "Fill" - with RGBA(175, 191, 224, 0.5) . Take another "rectangular icon" and adjust it to center Take "label" - and add required text (Eg: "do you want to proceed?") Take two buttons. Update text of Button1 to "OK" and other to "Cancel" On Click of the respective control (to open the pop-up), add this expression : UpdateContext({locOpenPopup:true}) select "cancel" and "ok" button and add UpdateContext({locOpenPopup:false}) on "OnSelect" property. add appropriate actions on "cancel&quo

    Success confirmation on a record submission - Canvas Application

    In this post let us see, how to show a successfully submitted record's data back on to the form, as a confirmation. Take two screens  Home Screen Success Screen On Home Screen: Take a Form Control on the Home Screen and map it to respective entity. In this post we are mapping it to Registrations entity. Take a Button Control and input the below expression, to create records into Registrations Entity. SubmitForm( frmRegistration ) Now, let us implement how to redirect the user to Success Message screen to successful record submission. In order to achieve this, we are going to make use of one of the Form Control's properties - OnSuccess. So, OnSuccess we are going to implement Success Screen navigation as below Navigate(' Success Screen ')   Success Screen Take a label to show - success message, as below "Registration was successful. Registration Id: " & frmRegistration .LastSubmit.'Registration Number' LastSubmit  property of a From Control helps u