As per Microsoft, the WS-Trust authentication type that is used by custom clients to connect to Dataverse is deprecated.


You will be redirected to the secret value screen. Now, copy the secret value
Create an Application User in Microsoft Dataverse:
Ensure appropriate application user form has been selected as shown below
Now, the form opens and enables you to provide value at "Application ID". Copy the "Application (client) ID" created in the first step and paste it here. Save the record.
 Create a console application to connect to Microsoft Dataverse
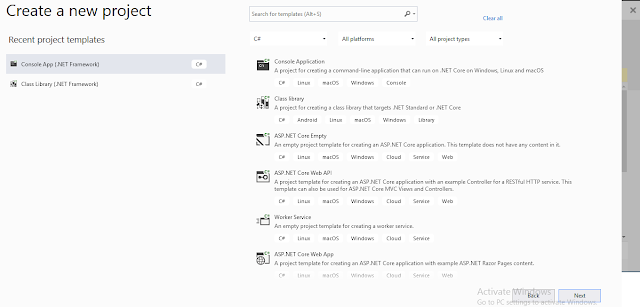

This change applicable to the client applications which tries to connect to Microsoft Dataverse. This helps developers to connect to Microsoft Dataverse with more security and protect access to the application as per the business requirement.
So, in order to connect to Microsoft Dataverse, we can leverage Azure Active Directory.
Pre-requisites:
- App Registration in Azure Portal.
- Create an Application User in Dataverse.
- Consume the Application Registration details in Console Application
Application Registration in Azure Portal:
- Log in to Azure Portal
- Go to "Azure Active Directory" --> "App registrations" --> New registration
- Provide a Name, Choose respective "Supported account types" (first option would work for the users in same tenant)
- Click on "Register"

- Once the App Registration is completed, you will be redirected to the registered app Overview
- Copy the Application (client) ID
- Click on "Add a certificate or secret" on the Essentials tab or Click on "Certificated & secrets" to create a secret to leverage this app to access Microsoft Dataverse

Upon clicking on "Add a certificate or secret" - you will be redirected to create a secret. secret Click on "New Client Secret" --> Provide "description" --> click on Add

You will be redirected to the secret value screen. Now, copy the secret value

Create an Application User in Microsoft Dataverse:
Go to https://make.powerapps.com/ --> Select appropriate environment
Click on the settings (gear symbol) --> "advanced settings"
Click on "Settings" module --> System --> Security -->Users
Select "Application Users" view to create "New" application user record

Ensure appropriate application user form has been selected as shown below

Now, the form opens and enables you to provide value at "Application ID". Copy the "Application (client) ID" created in the first step and paste it here. Save the record.
Now, click on "MANAGE ROLES" to provide appropriate security to perform the required operation on the Microsoft Dataverse and click OK.


- Open Visual Studio ( for this blog post, I am using VS 2019)
- Create a new project --> Select "Console App (.Net Framework)" --> Next
- Provide a name for the Project and choose Framework as 4.6.2 and click on "Create"


Now, go to Solution Explore --> References --> "Manage NuGet packages"
Search for "Microsoft.CrmSdk.XrmTooling.CoreAssembly" and Install it
Add "Microsoft.Xrm.Tooling.Connector;" assembly to the Program.cs
using System;
namespace ConnectMSDataverse
{
class Program
{
static void Main(string[] args)
{
string msdataverseURL = "https://xxxxx.crm.dynamics.com;";
string applicationID = "1676c3f0-xxxx-xxxx-xxxx-425bded41fea";
string appSecret = "5xQ-dM~lTjYkr-Saz64lfw99g2ytp.0WKW";
string connectionString = "AuthType=ClientSecret; url=" + msdataverseURL + "ClientId=" + applicationID + ";" + "ClientSecret=" + appSecret;
CrmServiceClient crmServiceClient = new CrmServiceClient(connectionString);
try
{
if (crmServiceClient != null && crmServiceClient.IsReady)
{
Console.WriteLine("\nConnection successfull.");
Console.ReadLine();
}
else
{
Console.WriteLine("\nPlease make sure the Application ID or Secret is correctly provided.");
Console.ReadLine();
}
}
catch (Exception ex)
{
Console.WriteLine("Exception " + ex.Message);
Console.ReadLine();
}
}
}
}
Program.cs file can be downloaded at git repo
Hope you find this blog helpful. Please share your feedback over comments.
Hope you find this blog helpful. Please share your feedback over comments.
Comments
Post a Comment